Procedure
|
You are on the Employees grid.
- Right-click the grid to see the menu.
- Click Customise Columns (Ctrl+U).
The Customise Columns window appears.
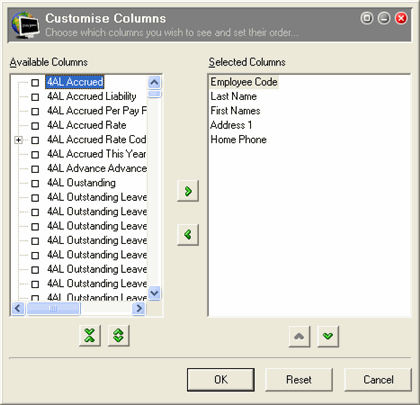
- To add a column to the grid, click the check box for the required column in the Available Columns list
-or-
Click the required column in the Available Columns list and click the move right  icon. icon.
- To remove a column from the grid, click the required check box in the Selected Columns list to deselect the column
-or-
Click the required column in the Selected Columns list and click the move left  icon. icon.
- To change the order of the columns, click the required column and then the move up
 and move down and move down  icons. icons.Note: Although you can include "Notes (shown below record)" in your grid report, they are often displayed on top of other information for that record.
- Click OK.
- To save your changes, right-click the grid and select Save GRID Layout.
- In the Layout Name field, type a name for your layout and click OK.
Your customised grid is now saved for future use.
|
